USMA High Altitude Balloon Launch
The moment you’ve all been waiting for. The definitive post on the launch. I will cover our payloads, rigging, launching steps, recovery, and steps for next launch. Grab yourself a nice cold space beer and fill up!

Launch Path - nearly 90 miles!
Planning and Preparation
This obviously was the most crucial phase to our launch - how else were we going to get a successful payload tested with modules aboard? I will go over the actual payload with modules in a later section, but the Planning and Prep phase had several goals:
- Identify what modules are going on the Balloon
- Test and install payloads
- Identify power system
- Coordinate resources for launching
- Weight + Power budget
- Identify jobs for everyone on the team
So not only did we have to build the payload, but we needed to identify tasks for everyone who came. I actually found making every member a “point-of-contact” for one of the modules, even if they had no prior experience, made everyone feel valued and contributing. It also let them learn something new!
To accomplish tasks at the pre-launch meetings, I made the mother of all excel spreadsheets. Below is a screenshot. It chiefly held a to-do list for each of the modules, a tentative timeline, contact information, and the mass/power budget.

Spreadsheet Example
This kept our ship running smoothly and ensured our payload met spec for the build.
The Payload
We had a total of 9+1 modules on the payload, identified in this screenshot:

Payload Modules
Here they are listed with a brief explanation:
- (top left) HF Radio Module - Check this blog post for more explanation,
- Camera - A simple GoPro fastened inside the styrofoam for continuous video
- SSTV Module - check this blog post.
- GPS Radio - APRS in layman’s terms.
- (top right) Anker Battery - these phone chargers actually did terrific as power for the whole balloon
- Central Power Distribution System - A simple perfboard with wire terminals and a boost converter to allow for 5V and 9V operation for all payload modules
- Raspberry pi - connected with a PiCam, this logged GPS data and took pictures over a long period time for us to characterize data.
- (bottom left) Time Dilation - students involved with a Physics study attempted to show time relativity on the ground vs high in the air.
- Wet Yeast - experimental yeast to make Space Beer!
Pre-Launch
Prior to the launch, we enabled each of our vehicles with APRS. Here they are in action:

APRS
However, our comms systems severely degraded during the journey. We were only using a handheld inside the car - a roof-mounted antenna would greatly improve our communication.
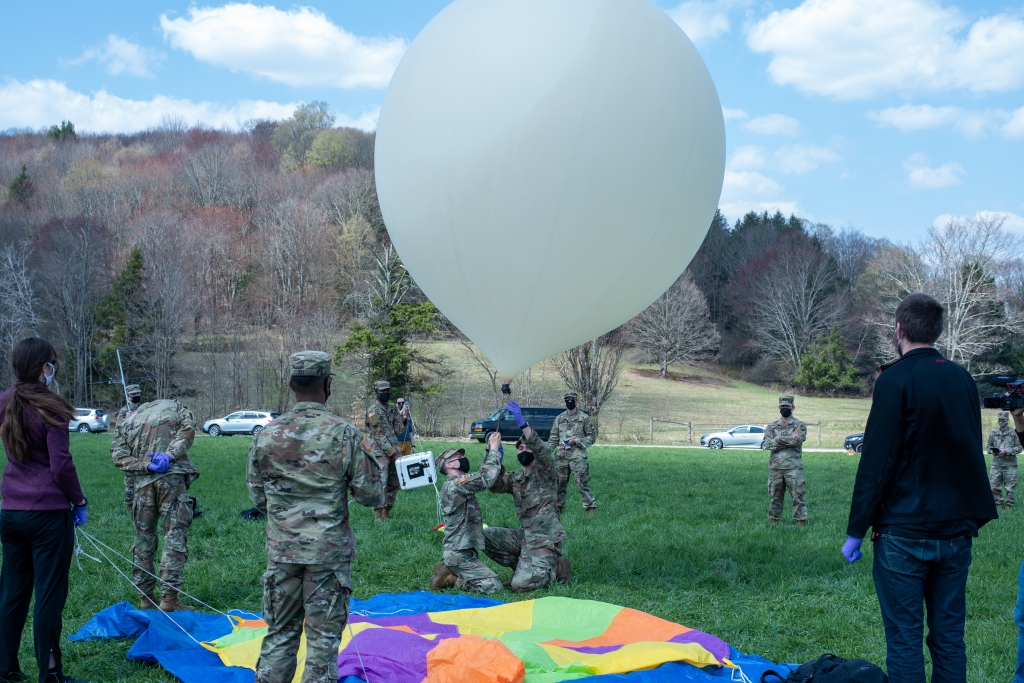
We used websites like this for our launch prediction. We chose a relatively flat site for launch, and it was beautiful! Right before the launch we also did the rigging for the payload - in the future, this can be accomplished much prior than on the landing site.

Launch Site. Stunning!
Launch
Launch for us took about 90 minutes… this is avoidable. We should have arrived on-site with the payload rigging already formed - it would then be a simple operation of securing the payload, turning on power, and filling the balloon! Well, we have more launches for a reason.

Just about to be released!
Travel + Recovery
Balloon Stats:
- Weight - 5.2 lbs
- Distance - 90 miles
- Max height - 74,000 ft
- Max speed - 182 mph
From here, we jumped in the cars and drove to the landing site. We had a cadet doing continual resections for the landing zone. In addition, we had a dedicated team that did not attend the launch, head right our to the landing zone - our “goalie team.”

Goalie Team in-action at the landing site
Closing
Overall, the project was a huge success. 14 Cadets and 7 faculty members participated, and continued the project for another year. Valuable data was presented at our Projects Day on 19 APR. Plus, this left us with several AAR comments:
- Improve communication systems
- Lighter balloons for longer flight time
- Less wait time on the launch site
- More balloons!
We are actually planning on hosting a tethered launch in the fall. I will look more into its feasibility. In the meantime, enjoy this photo gallery!


